To perform an isometric wall squat after ACL surgery: place your feet thigh-length from the wall, hip-width apart. Lean back, flatten your spine against the wall, then pull your hips down while pushing evenly through both heels. Stop if pain exceeds 3 out of 10. Hold as long as you can maintain proper form; your goal is 5 minutes by the end of recovery. Watch for compensation patterns: knees caving in, hips leaving the wall, or weight shifting to the uninjured leg.
Why the isometric wall squat is a cornerstone of ACL recovery
The isometric wall squat builds quad, hamstring, and glute strength simultaneously without requiring movement at the knee joint. That makes it uniquely safe in the early weeks after ACL surgery, when the knee needs load but can't yet tolerate dynamic exercise. It also exposes the compensation patterns that, left unchecked, will undermine the rest of your recovery.
Most exercises after ACL surgery involve movement. The wall squat doesn't. You hold a position, which means your body can't cheat by redistributing load mid-rep the way it does in a squat or leg press. The hold reveals everything: which leg is doing the work, whether your spine is neutral, whether your weight is even through both heels.
When this exercise is performed correctly, it delivers a concentrated set of benefits:
- Building strength in the quadriceps, hamstrings, glutes, and other muscles controlling the hip
- Gradually exposing the knee to greater ranges of flexion in a controlled, low-risk environment
- Restoring optimal length-tension relationships between the hips, lower back, and lower leg
- Training the nervous system to sustain proper mechanics as the body fatigues
- Exposing compensation patterns: the ways the body shifts load away from the injured quad (covered in depth in our guide to building quad strength after ACL surgery)
Simply put, this exercise is a powerhouse. All you need is a wall, the knowledge to do it right, and the discipline to stay honest with yourself about form. If you provide the wall and the discipline, this guide provides the knowledge.
Match the intent of the exercise with the execution. If you're going to work your way through ACL recovery, make sure each rep is actually accomplishing what you set out to accomplish. A sloppy wall squat trains the wrong patterns. A focused one rewires them.
When can you start the isometric wall squat after ACL surgery?
Most athletes can begin isometric wall squats within the first one to two weeks after ACL surgery, provided pain stays below 3 out of 10. Start with 30-second holds at a shallow knee angle (60 degrees) and build from there. If you are doing prehab before surgery, start immediately; strong pre-op quad function is one of the strongest predictors of better post-op outcomes.
The wall squat is one of the earliest bilateral load-bearing exercises you can introduce after surgery because it doesn't require the knee to move through a range. You control the angle. You control the depth. If something causes pain, you stand up. That makes it different from a squat or leg press, where you're committed to the movement once it starts.
Early introduction matters because quad atrophy accelerates quickly after injury. The longer the quad stays in neurological shutdown, the harder it becomes to reactivate. The wall squat is one of the tools that keeps the connection alive.
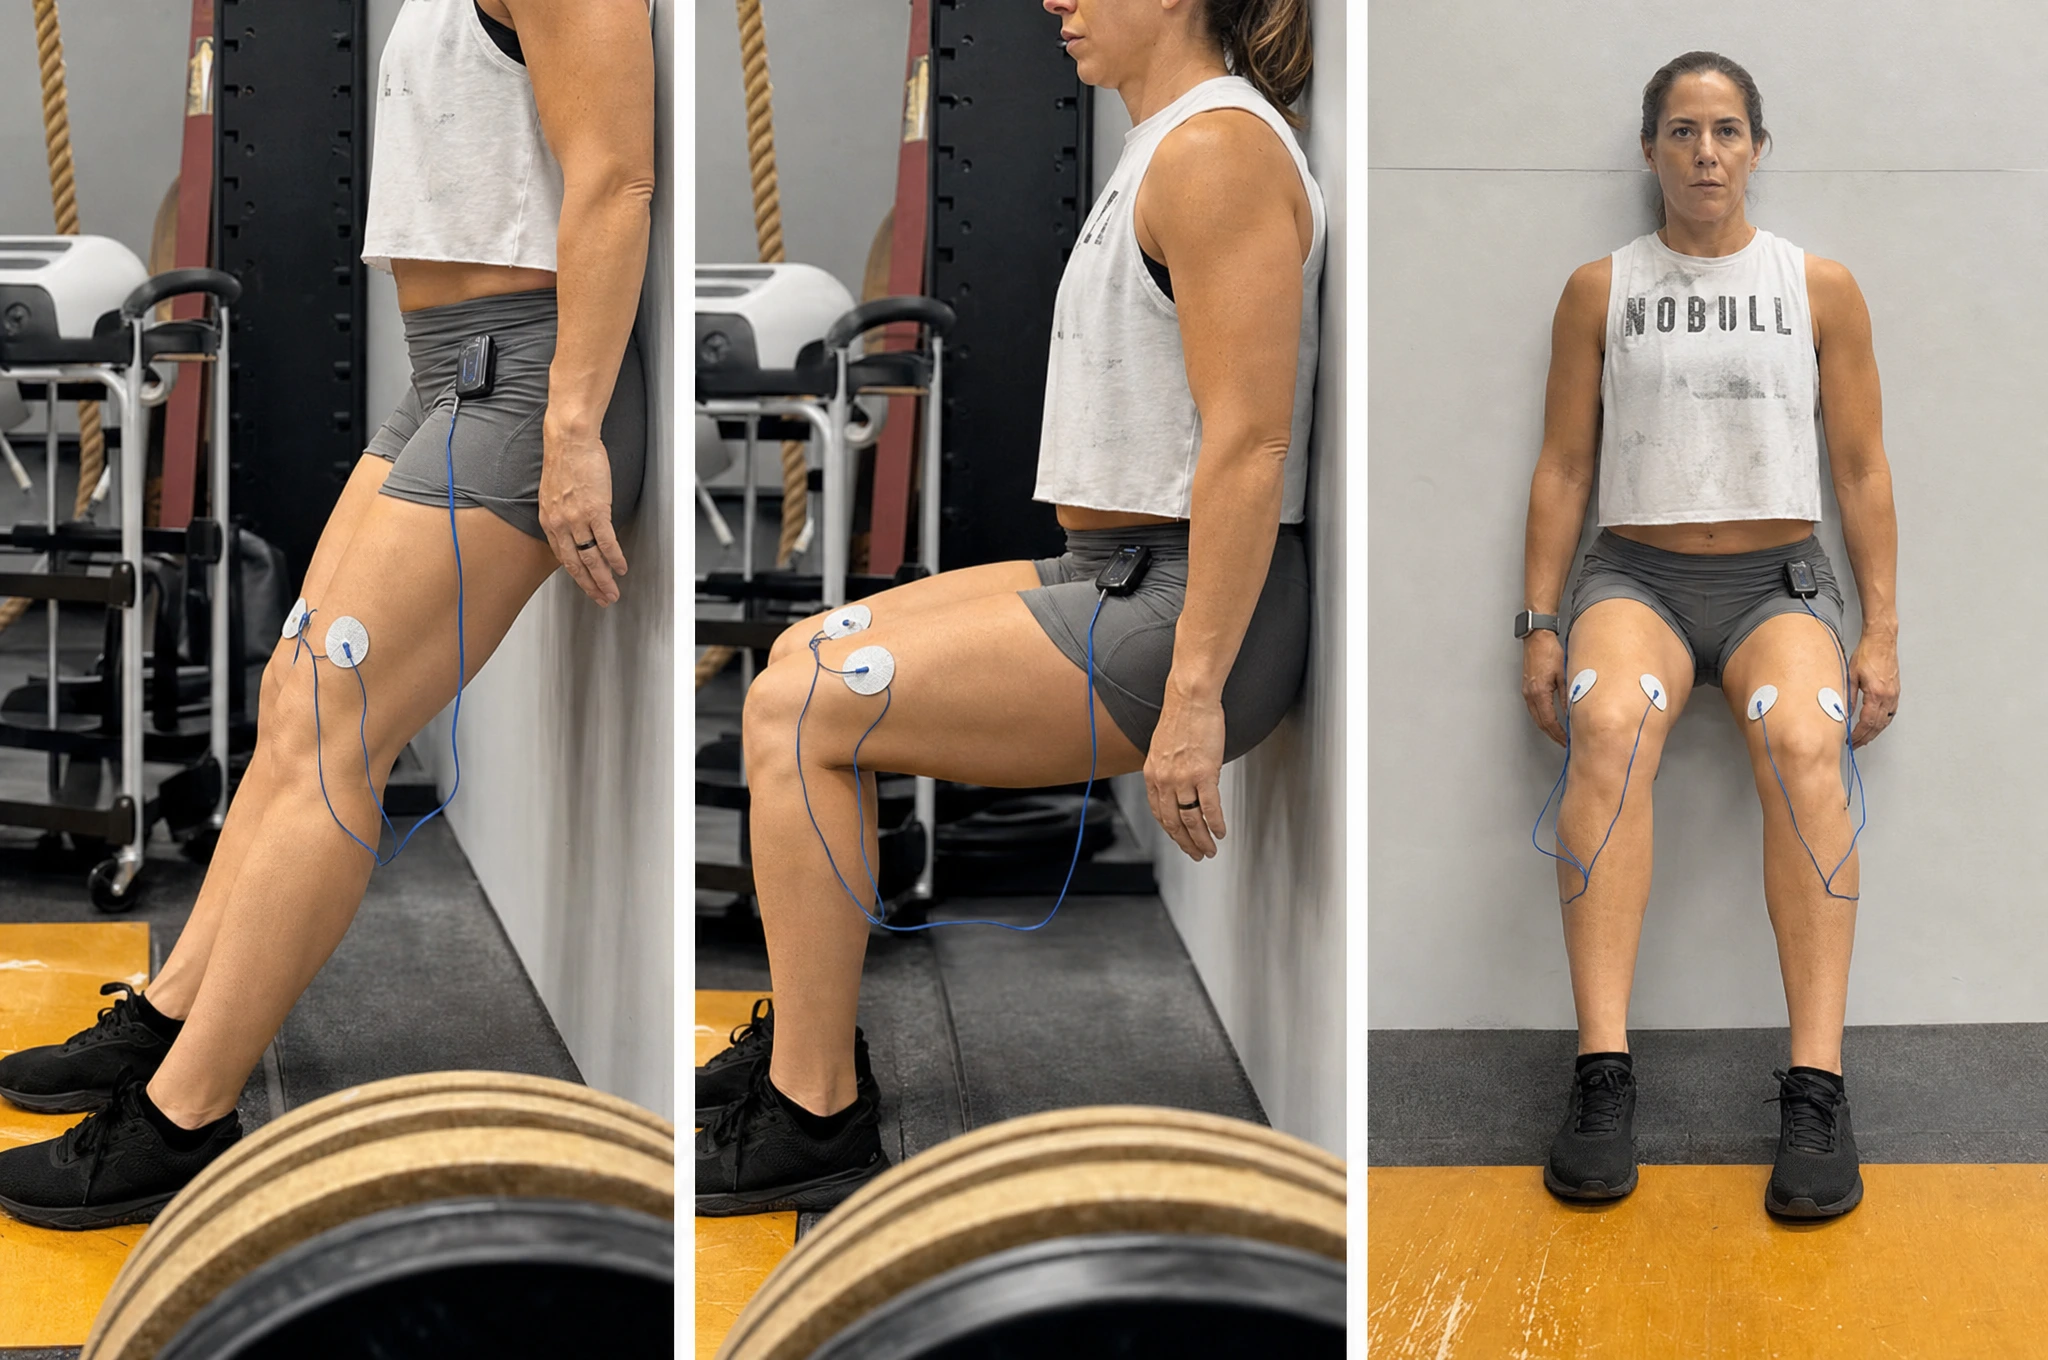
How do you set up the isometric wall squat correctly?
Stand with your back to a wall. Walk your feet out until they are approximately thigh-length away from the wall. Feet should be hip-width apart, toes pointing forward or slightly out. Lean back until your entire back (including lower back and head) rests flat against the wall. Then pull your hips down and back until your knees are at 90 degrees or less.
Foot position is the detail most athletes get wrong. Too close to the wall, and your knees will drift in front of your ankles as you descend, shifting load away from the hamstrings and onto the knee joint. Too far, and you won't be able to maintain contact between your lower back and the wall. The correct distance puts your heels directly under your knees at the bottom of the squat.
Before you pull into the squat, brace your core and flatten your lower back against the wall. This is harder than it sounds. Many people have enough anterior pelvic tilt that maintaining a neutral spine requires active core engagement from the first second of the hold. That's intentional. The wall squat trains the whole system, not just the legs.
What are the 4 rules for executing the wall squat?
The 4 rules are: (1) understand the intent before you start, (2) position your feet correctly, (3) execute with full focus on a neutral spine and even heel pressure, and (4) identify compensation patterns during the hold. Rules 1 and 4 are the ones most athletes skip.
Understand the Intent
The intent is to train the muscles of the upper leg (hamstrings, quads, abductors, adductors, glutes) and core to work together to support the upper body in hip flexion and knee flexion. When trained properly, you reprogram the body to use muscles optimally, eliminate compensation patterns, and reduce stress throughout the kinetic chain.
If you don't know what you're trying to accomplish, you won't notice when you stop accomplishing it.
Position Yourself Properly
Place your feet approximately thigh-length away from the wall. Your heels should sit directly under your knees when you pull into the squat. Feet should be hip-width apart. Use your arms for support against the wall as you get into position.
Take your time here. Moving a foot an inch in the wrong direction changes which muscles are doing the work.
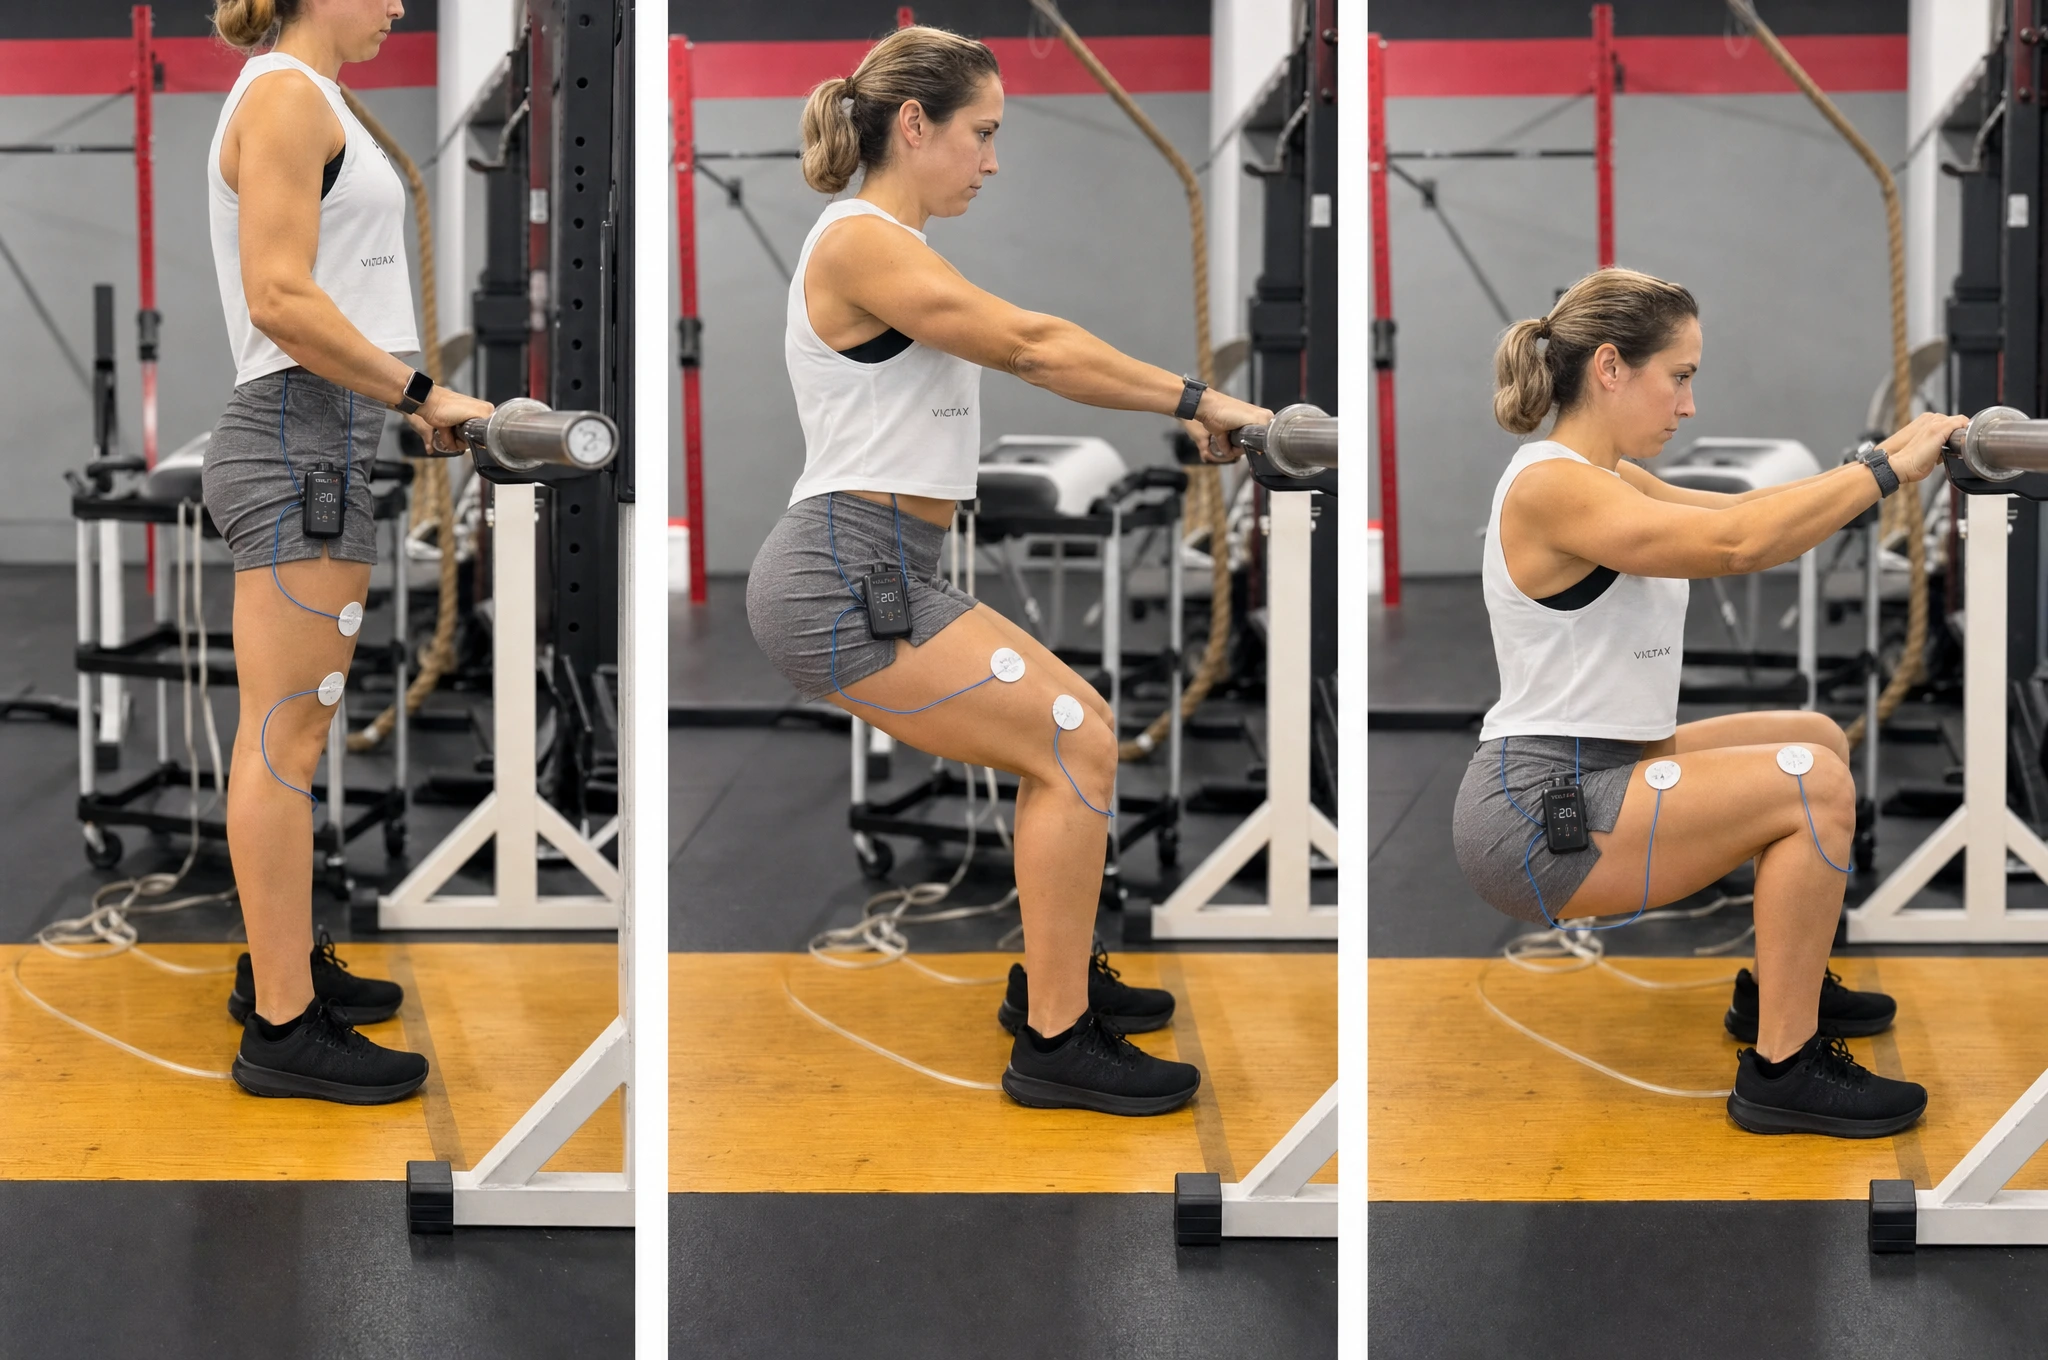
Execute with Focus
Flatten your back against the wall to create a neutral spine (this requires real core activation). Maintaining foot position and wall contact, pull your hips down and back into the wall, activating the hamstrings.
Key details: Distribute weight so you push straight down through both heels evenly. Only go as deep as you can maintain a neutral spine and heel pressure. Do not push into discomfort greater than 3 out of 10. Breathe through your diaphragm. Keep your upper body relaxed.
Hold for the maximum duration you can maintain proper form. Goal: up to 5 minutes by the end of your ACL recovery.
Identify Compensation Patterns
Resetting compensation patterns is one of the most important parts of ACL recovery. The body will do everything possible to take load off the injured quad after surgery. Your job is to train the body to load the quad again. That starts with catching every deviation from proper form during the hold.
See the full list and comparison table below.
What compensation patterns should you watch for in the wall squat?
The seven main compensations are: feet too wide or narrow, weight shifted forward or back on the foot, knees in front of or behind the ankles, knees caving in or pushing out, hips pulling off the wall, lower back arching off the wall, and shoulders or head leaning forward. Most athletes show at least two or three of these on the first attempt.
Your body learned to move without fully loading the injured leg long before surgery. Surgery doesn't erase that pattern. The wall squat surfaces it in real time so you can address it instead of reinforcing it.
| Correct Form | Compensation Pattern | What It Reveals |
|---|---|---|
| Weight even through both heels | Weight shifted to uninjured leg | Quad inhibition on injured side |
| Knees aligned over second toe | Knees caving inward (valgus) | Weak glutes or hip abductors |
| Lower back flat against wall | Lower back arching off wall | Tight hip flexors or weak core |
| Hips against wall throughout hold | Hips pulling away as fatigue sets in | Hamstring weakness or fatigue |
| Head and shoulders resting on wall | Head forward, shoulders hunched | Upper body tension or habit |
| Heels directly under knees | Knees drifting forward of ankles | Feet too close to wall |
I see the same two compensations in almost every athlete on week one: weight shifted to the uninjured leg, and the lower back peeling off the wall when fatigue hits around the 45-second mark. The weight shift is the bigger problem. Some athletes are so used to offloading the injured side that they genuinely can't feel the difference between 60/40 and 50/50 weight distribution without someone watching or a scale underneath them. We use video analysis to show athletes their own patterns. Once they see it, they can't unsee it.
How do you progress from 30 seconds to 5 minutes?
Start with 30-second holds at a shallow knee angle (60 degrees) in weeks 1 and 2. Add 15 to 30 seconds per week while maintaining perfect form. Deepen the knee angle gradually as strength allows. The 5-minute goal is not arbitrary; it requires sustained, symmetric neuromuscular control and is a reliable indicator of meaningful quad activation quality.
Here is a general progression framework. Adjust based on your pain levels and your PT's guidance:
- Weeks 1 to 2: 30 to 60 second holds at 60 degrees, 3 to 4 sets. Focus entirely on form, not duration.
- Weeks 3 to 4: Build toward 90 to 120 seconds per hold at 70 to 80 degrees. You should feel the quads engage symmetrically.
- Weeks 5 to 8: Work toward 3-minute holds at 90 degrees. This is where the real test begins. Three minutes is long enough that the body will start looking for shortcuts.
- Month 3 and beyond: Build toward 5 minutes at 90 degrees with equal weight through both heels. Verify with a scale if available, or use video to check your lateral alignment.
The 5-minute milestone matters because it correlates with the kind of neuromuscular control that functional activities demand. Walking, stairs, and eventually running all require the quad to sustain activation over time, not just produce a peak force.
What should you do if the isometric wall squat causes pain?
Pain at 1 to 2 out of 10 is acceptable and expected, especially in the early weeks. Pain at 3 out of 10 or above means stop, adjust, and reassess. Common fixes: raise your angle (less knee flexion), check whether your weight is forward on the foot, and verify that your lower back is flat against the wall rather than arched.
Pain during the wall squat is almost always a positioning issue before it is a tissue issue. The most common culprits:
- Knee angle too deep: Going to 90 degrees before the quad can handle it. Back up to 60 or 70 degrees and build over weeks.
- Weight forward on the foot: This loads the knee joint instead of the muscles. Push back through the heels until you feel the hamstrings engage.
- Compensating through the hip: If one hip is lower than the other, the lower back will rotate. This creates asymmetric loading and sometimes pinching in the hip flexor.
If pain persists above 3 out of 10 across multiple sessions regardless of adjustments, loop in your PT or surgeon. Pain that doesn't respond to positioning changes is information worth escalating.
The neuromuscular approach we use at Accelerate ACL helps identify exactly where the system is struggling to activate, which makes it possible to address the root cause rather than just manage the symptom. This is the kind of detail that matters, and the kind most standard rehab programs don't have time to dig into.
Want the Full ACL Recovery Playbook?
If you're going to optimize the recovery process, you need to know what you're up against. Grab the free report: it walks through the 7 biggest challenges in ACL recovery and the proven process designed to overcome each one.
Download Free ReportGet detailed exercise guidelines, safety progressions, and a complete prehab game plan, including the isometric wall squat progression from day one through surgery.
Download Ultimate Prehab GuideReferences
- Palmieri-Smith RM, Thomas AC, Wojtys EM. Maximizing quadriceps strength after ACL reconstruction. Clinics in Sports Medicine. 2008;27(3):405-424. doi.org
- Grindem H, Snyder-Mackler L, Moksnes H, Engebretsen L, Risberg MA. Simple decision rules can reduce reinjury risk by 84% after ACL reconstruction. British Journal of Sports Medicine. 2016;50(13):804-808. bjsm.bmj.com
- Sonnery-Cottet B, et al. Arthrogenic muscle inhibition after ACL injury. British Journal of Sports Medicine. 2019;53(19):1221-1228.
- Shelbourne KD, Gray T. Minimum 10-year results after anterior cruciate ligament reconstruction: how the loss of normal knee motion compounds other factors related to the development of osteoarthritis. American Journal of Sports Medicine. 2009;37(3):471-480.
Disclaimer: This content is for educational purposes only and does not constitute medical advice. Always consult your physician or physical therapist before starting or modifying any exercise program, especially after ACL surgery.